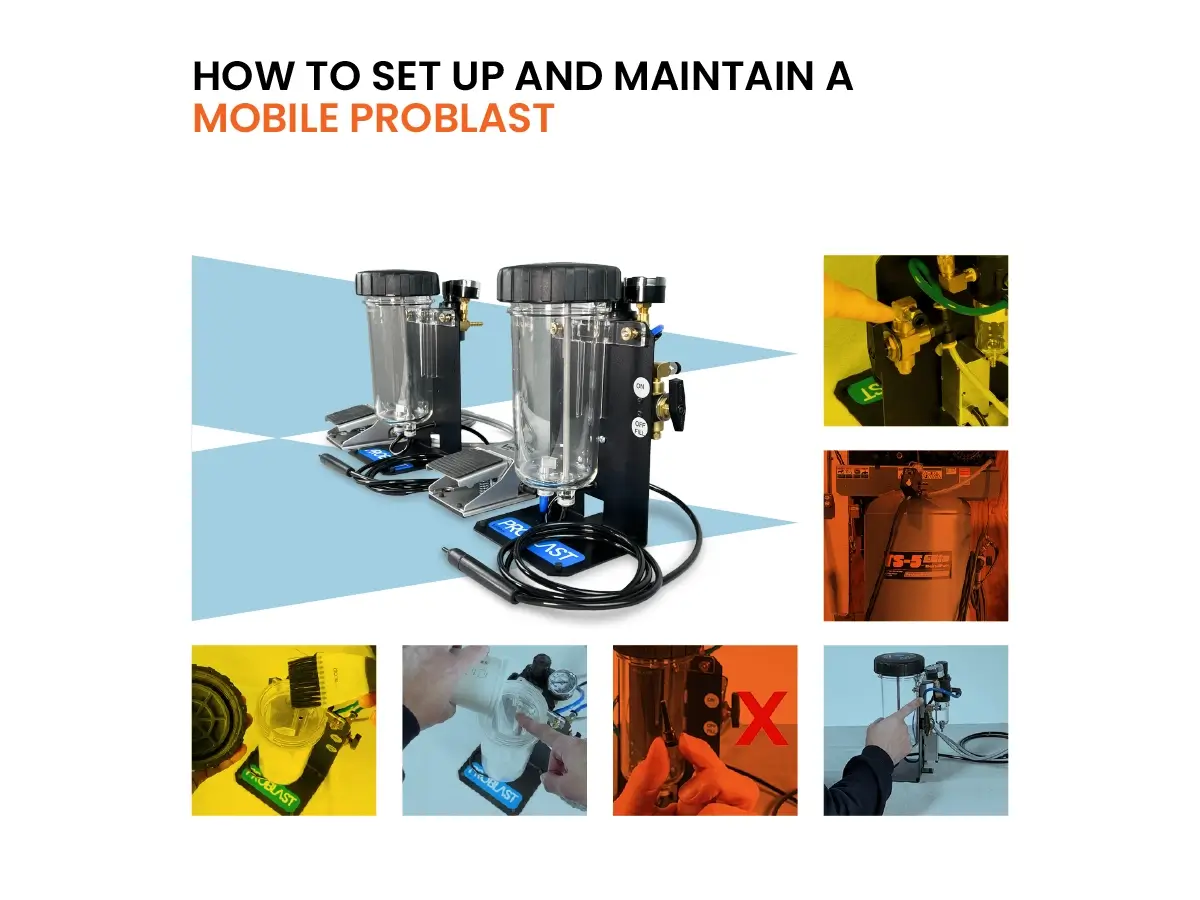
Got a Mobile Problast or Master Mobile Problast? Great! This is a setup and maintenance video for this mobile sandblaster, please watch this first to get the best performance and longest life out of your unit!
Video:
Timeline:
0:14 – Once you get it out of the box…
0:18 – Connecting your blaster to your air supply…
Link: https://vaniman.com/air-supply
0:57 – Minimum air compressor requirements…
1:30 – Properly putting media into the tank…
1:50 – While the lid is off (maintenance tips)…
2:30 – You’re ready to begin blasting…
3:13 – Important: regular maintenance…
How To Assemble a Sandblaster Handpiece (Video): https://www.youtube.com/watch?v=3izrT8ZfjGk&list=PLoYpAVyrY54wY0PLaCObRKsYU4oet4-YI
Web link: https://vaniman.com/handpiece
4:01 – If you get a clog (what to do, how to prevent)…
The text:
If you can’t watch the video with volume, here’s the text version:
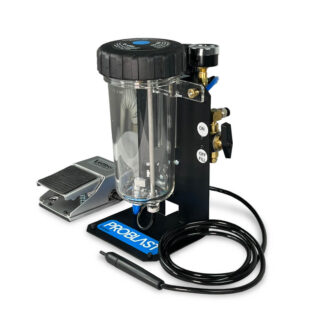
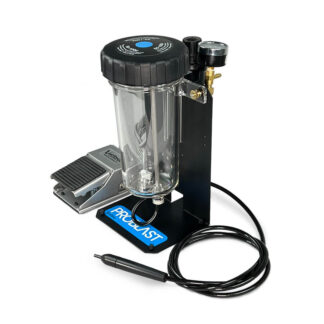
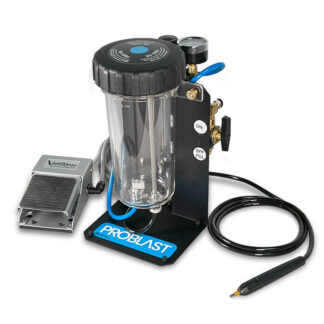
Unpack your blaster…
Once you get your Mobile Problast or Master Mobile Problast out of the box, you can uncurl the foot pedal and your hand piece.
Connect your blaster…
In order to use this blaster, you’ll need to connect it to your air supply.
Helpful link: Air Supply Connections for Blasters
In this video, we use a quarter-inch outer diameter urethane tubing connection, which fits right into the quick-disconnect that comes already installed on the Master Mobile Problast. The barb connection is already installed on the standard Mobile Problast, and both variants come with both types of connections.
Make sure your air supply is OFF before you connect it, and you need to keep it off when you remove the tank lid to fill it up with your blasting media. With the Master Mobile Problast, which we see here, you also need to make sure your switch is in the OFF position.
A quick note about air compressors…
Minimum requirements for Vaniman blasters are 90 PSI at 1.5 CFM. We recommend 2.5 CFM or better.
And, of course, how BIG it needs to be depends on how much you’re going to use it. A five or six gallon tank is fine for some users, not nearly enough for others. You should keep an eye on the pressure gauge on your blaster — if you see it running down while you’re blasting, it may be that your compressor can’t keep up, and is running out of compressed air on you.
Add your media…
When you put your media into the tank, be sure to keep a fingertip over the top of the manifold tube. If you get media in there, it’s not a huge problem, but once you start blasting, it’ll take a moment or two before the air and media mix balances out. The more media you pour in the top of the manifold tube, the longer it’ll take.
While the lid is off, make sure there’s no dust on the o-ring. Also, be sure to brush out the grooves on the tank and in the lid to ensure there’s no media or dust on them, because worn out threads can cause damage over time, including leaks, and you need a completely sealed system to function properly. It may also lead to the lid getting locked on, and you don’t want that!
Getting started blasting…
Once your media is in the tank and your air supply is connected, you are ready to begin blasting!
For the standard blaster, if your air supply is on and connected properly to your blaster, you’ll see the PSI setting on your gauge. With the Master Mobile Problast, you’ll need to flip the switch to the ON position, and then you’ll see your pressure on the gauge.
60 PSI is the factory setting, and that’s a great place to start, but you can adjust it to where you want. The more you experiment, the better idea you’ll get for where your ideal PSI is.
To adjust the PSI, pull up on the knob on top of the regulator and twist. To start blasting, step on that foot pedal, and off you go!
Maintaining your blaster…
Blaster maintenance is very important, so here’s what you need to know to keep your unit operating as it should.
First, just look at the tip. The nature of sandblasting is destructive, and over time, all that media coming out of the tip will wear it down, so you’ll need to replace it.
Helpful link: How to Assemble a Sandblaster Handpiece
For the Master Mobile Problast, please make sure that the switch is in the OFF position when you’re not using it. You don’t want to keep it pressurized when it’s not in use, because that creates strain on the tubing.
You’ll also want to make sure that you regularly move the tubing through the pinch valve. The valve inside this casing is one of the greatest points of wear on tubing, so make sure it isn’t always pinching the same spot. Move it around to keep your tubing in good shape.
Clogs in your blaster?…
If you get a clog in the blaster, that’s going to create a lot of performance issues.
One of the most important things you need to do is keep your media dry. Store it in a safe, dry, place, preferably in an airtight container. If you get moisture, that can lead to clumping, and that can lead to blockage.
If there’s moisture in your air supply, that can get into the tank, and again, cause clumping. You’ll see clumping first around the air inlet in the bottom of the tank, or you might see clumping in the holes at the bottom of the manifold tube.
If that happens, first you should correct the issue at the source – whether with the air supply or with the media from storage – and then you’ll want to get a toothbrush and brush those areas clear of those clumps and get it all out of your tank.
Once clear, it’s helpful to put the lid back on and blow some dry compressed air all the way through your blaster before refilling with more media.
If there’s a clog in the handpiece, you can take it apart very easily to clean it – again, see our other video on handpiece assembly for how to do that.
Inserting tubes into the tank…
If you remove the tank to swap it out, remember as you put it back on that this is also a critical point to watch. As you re-insert the tubing, you must make absolutely certain that you push that tubing in past the o-rings in the inserts at the bottom of the tank. If you don’t, you can get leaks or even damage the tank tubing inserts.
Leakage issues?…
If you’re getting leakage issues, the o-rings may be the culprit. Make sure the o-ring in the handpiece is in good shape and is flush with the tip, not crooked or out of place — and remember, this isn’t like playing ring toss, the ring doesn’t go over the tip. It helps to hold the nozzle cap upside down, then put in the tip, then follow that with the o-ring and let gravity help get it in the right position.
Also, make sure the o-ring in the tank lid is in good shape and all the threads are free of dust and debris.
And, again, make sure the tubes at the bottom of the tank are pushed PAST the o-rings there.
While you’re blasting, also please note: the system works best when the tank is full. You’ll notice a drop in efficiency as you blast when there’s not enough media in the tank.
Questions? Contact Vaniman today!