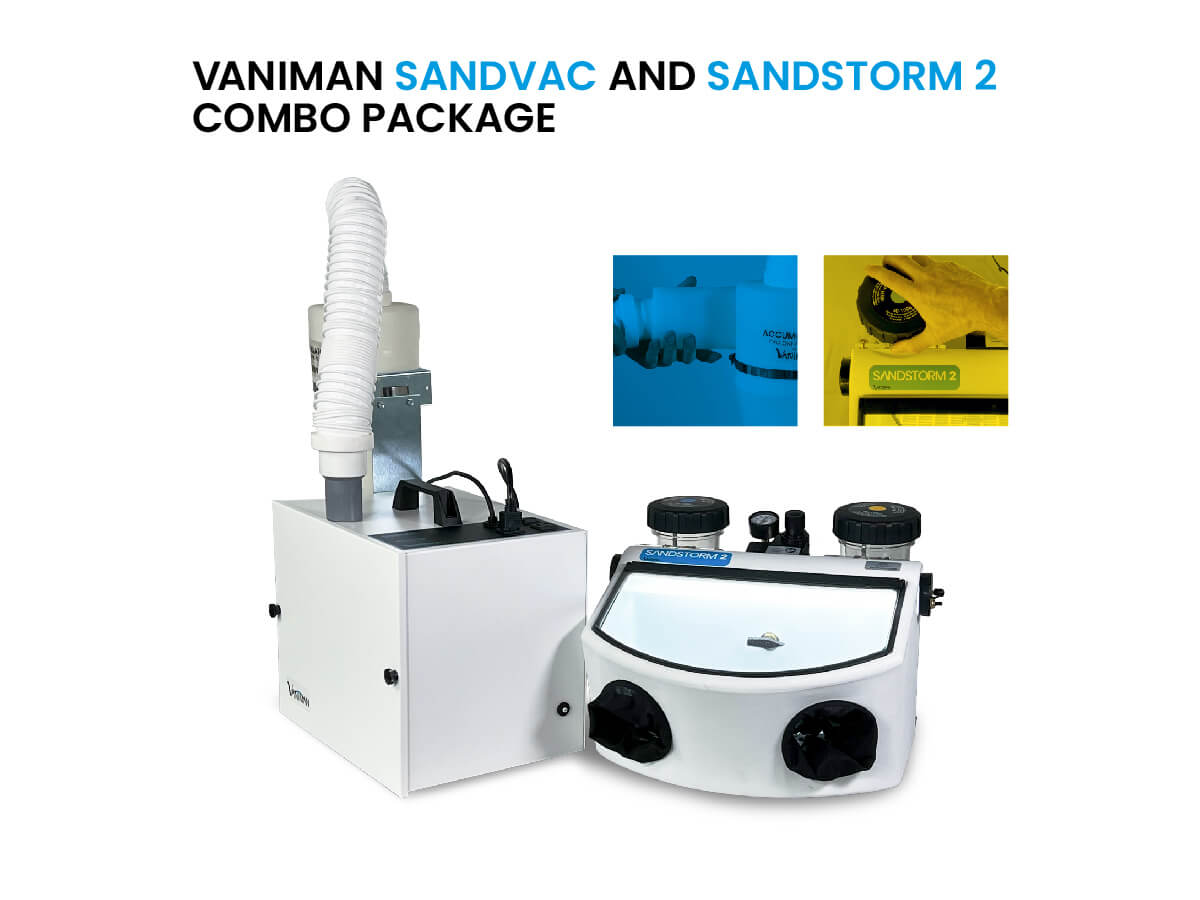
Dental labs are busy places, and equipment is one of the keys to success…And nothing beats a Vaniman sandblaster for precision cleaning, surface preparation, restoration, and more.
We’ve sold a lot of sandblasters over the years, along with a lot of dust collectors, and to this day, one of the most popular combinations is the SandStorm 2 dental sandblaster with a SandVac dust collector to capture the dust and debris. These versatile blasters are used for a variety of tasks, including:
- Surface prep
- Cleaning
- Polishing
- Removing residual cement or investment material
The SandVac is our dedicated blasting media dust collector, a perfect complement to the SandStorm 2. It comes with the pre-filter cyclone Accumulator included, and contains a specialized bypass motor to ensure a long life of collecting microabrasive media.
If you’re in the market for a dental sandblaster and dust collector, our go-to recommendation is the SandStorm 2 and SandVac.
If you’ve purchased these two together, here’s our video on how to set them up:
Purchase these items together:
-
 SandVac + SandStorm 2 Combo (Dust Collector and Sandblaster Together)Product on saleOriginal price was: $1,780.49.$1,691.47Current price is: $1,691.47.View Details
Transcript:
Here’s how to set up a Vaniman SandVac dust collector and a Vaniman SandStorm 2 microabrasive sandblaster. We encourage you to read the printed instructions included with every product for the most complete setup and maintenance references.
SANDVAC:
Remove the unit and other items from the box.
In the box, you’ll find:
- The foot pedal remote
- The filter bag replacement instructions
- The warranty registration card (we encourage you to register your products on our website, this will get you a free six month extension on your warranty)
- The dust collector’s instruction printout (again, please read this and refer back to it if there are any questions)
- The power cord
- A 6′ white hose with a gray reducer on one end
- The SandVac unit
Unpack the Accumulator.
The Accumulator will capture over 90% of all the dust that comes in, so you’ll really save a lot on filter bags.
In the box, you’ll find:
- The Accumulator body and bucket
- A 3′ white hose with a gray reducer on one end
- A small packet of hardware
- The Accumulator instructions
Mount the Accumulator to the dust collector. (See our video for installing the Accumulator – link in the description.)
Connect the three foot hose with one end at the top of the Accumulator and the other end to the port on the top of the dust collector. The gray reducer may require some effort the first time, but it will fit.
Connect the six foot hose to the inlet port on the side of the Accumulator.
Connect the foot pedal bellows to the remote port on top of the dust collector.
Connect the power cord to the dust collector, and plug it into an outlet. Test the dust collector by stepping on the foot pedal to start it.
SANDSTORM 2:
Remove the sandblaster from the box, as well as the sample media and packet with instructions, warranty registration, static cling window protector, power supply, and air supply connections.
Open the packet with the power supply and plug the cord into the jack on the side of the blaster. Then plug the other end into a standard outlet, or, alternately, into the outlet on the SandVac (you’ll need to make sure the dust collector is also on). Twist the switch to turn the blaster’s LED light on.
Apply the static cling window protector. This will keep any ricocheting media or debris from scratching the window and fogging it up over time. It’s much cheaper to replace window protectors than the glass window itself, so we strongly recommend using one!(See our video using the wet application method – link in description.)
Fill your tanks with abrasive media, ensuring that the size of the media matches the size range on the top of the tank lid. Use a finger tip to cover the manifold tube so you don’t get media in it. Do not fill the tank past the fill line!
Brush any loose media off the threads of the tank, then put the lid back on. Do not over-tighten the tank lid. (Pro tip: the English text of the label on the lid should face directly forward.)
Connect your air supply. For additional instructions and specifications, see our website: vaniman.com/air-supply-connections-blasters
…Once your air supply is connected and your air supply is on, you should see a pressure reading on the gauge.
Connect the six foot hose from the Accumulator to the port in back of the sandblaster. Again, the gray reducer may require some effort the first time.
You are now ready to begin sandblasting. First, start the dust collector’s motor before you begin (step on the foot pedal remote).
To begin blasting, step on the blaster’s foot pedal. To stop blasting, release the foot pedal. For standard sandblasters, there will be a bleedoff as the tank depressurizes each time you release the pedal. On our Instant-Off blaster models, the flow of media will stop immediately when you release the foot pedal, and will only depressurize when you turn the blaster’s selector to OFF.
If you have any questions, please call Vaniman at (760) 723-1498, or email us at service@vaniman.com!
