Diagnosing a bad shaker motor
1. Shaker stops working
2. Shaker sounds noisy
Installation Instructions
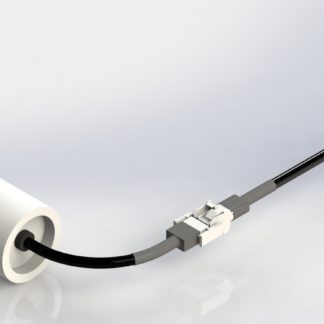
Replacing a StoneVac Shaker with quick slide connectors:
1. Remove the eight (8) screws with a Phillips head screwdriver from the top panel of the StoneVac unit. Slide the panel towards the front of the unit and then lift up to remove the panel.
2. Open the unit’s front door to reveal the shaker. With a large blade screwdriver (or 5/16” nut driver if you have one) loosen the band clamp around the shaker.
3. Locate the shaker cable in the top compartment of the unit. Remove the quick connectors from the switch.
4. Cut the wires attached to the shaker motor just below the quick slide connects. Do NOT cut the wires connecting the quick slide to the Stone Vac.
5. Pull the shaker motor cable our of each grommet until it is in the lower portion of the Stone Vac. Remove the shaker motor from the unit.
6. Place the new shaker in the clamp and tighten to secure.
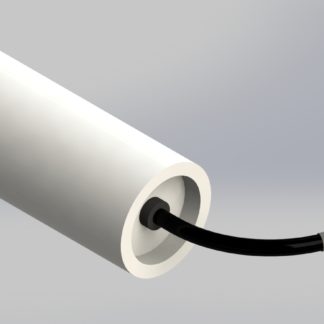
7. Thread the new shaker’s cable through the grommet into the compartment above.
8. Place the two (2) newly provided quick slide connectors onto the exposed wires. Using a crimping tool or pliers, squeeze the narrow, cylindrical part of the quick slide connector. The bare wire should be in contact with the metal in the connector while the crimped area holds onto the wire’s sheath.
9. Place these connectors onto the switch terminals or quick connectors (depending on unit). Test the motor keeping your hands out of the unit. Remember the shaker should not be run for longer than five (5) seconds or more than two (2) times a day.
10. Place the top panel back on the unit by setting it on the case and then sliding it towards the back of the unit.
11. Replace the eight (8) screws with a Phillips head screwdriver and close the front door of the unit.
Replacing Shaker with plastic housing/plug style connnectors:
1. Open the unit’s front door to reveal the shaker. With a large blade screwdriver (or 5/16″ nut driver) loosen the band clamp.
2. Disconnect the plastic plug housing from the mating cap housing and remove the shaker.
3. Place the new shaker into the clamp and tighten to secure. Connect the new plug housing to the hanging cap house, making sure the connector seal is in place between the two housings.
4. Close and secure the door to the unit. Test. Only use for 5 seconds at a time.
**Replacement shaker: Part # 97003 (120V)**
**Replacement shaker assembly: Part # 2834(120V)**